Monday, August 30, 2010
Utility lines laid in trenches, August 30, 2010
Saturday, August 28, 2010
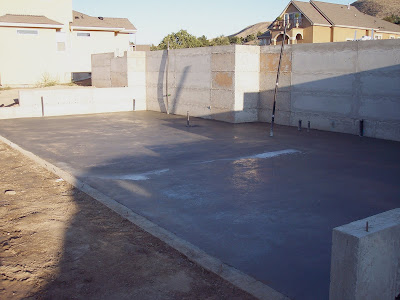
Garage Slab Poured, August 27, 2010
We will have a three-car garage with separate doors for each stall.

This photo was taken from the front and shows the newly poured slab, which will become the garage floor. The stall on the far right will lead on to the covered portion of the deck.
Thursday, August 26, 2010
Monday, August 23, 2010
Framing, continued over the weekend
Framing as of August 22, 2010
West back corner of basement

East back corner of basement

West front corner of main floor foundation

Front, looking SW to NE

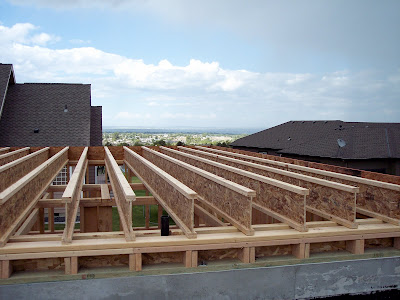
TJI joists (engineered wood) over the basement.
Wednesday, August 18, 2010
Framing the Basement
Basement being framed, August 18, 2010
Selecting "Solar Tubes" for Natural Lighting
A basic TDD consists of four primary components...
· Dome
· Flashing
· Tube
· Diffuser
Sunlight enters the device through the dome. The light is channeled through a highly reflective tube to an interior room of your home. But before it enters your room, it is "scattered" through a diffuser to create a soft light effect. The flashing is between the dome and the roof to prevent water from leaking into your home.
Rules of thumb for any tubular skylight:
· The shorter and straighter the tube the better performance.
· South or West facings are best in the Northern Hemisphere.
· Look for higher reflective tubing.
· There are two types of tubing used a multilayer film and an electrobonded tubing (multilayer film can delaminate over time from UV exposure).
· Manufacturers tend to over estimate the square footage coverage, so when in doubt go for larger tube diameter.
 |
| We're planning to install TDDs in the hall bathroom, and the entry between the foyer and the great room. |
Should you get rigid or flexible tubing? The rigid shaft sun tunnel offers up to 3 times the light in a room than the flexible shaft model, because of the fact that the loss of light is minimal in the process. The highest individual transmittance recorded for a flexible tube stretched was 6.8%, which was less than one sixth of that for the rigid tube. The rigid sun tunnel is suitable for places that require direct and longer tunnel length, especially great for those areas with less sunlight or the North facing roofs, giving 98% reflectivity.
You can install both the tubes on roofs with slopes between 15 degree and 60 degrees, and the installation process requires only basic carpentry skills.
Labels:
natural light,
solar tubes,
solar tunnels,
TDDs,
tubular skylights
Tuesday, August 17, 2010
Monday, August 16, 2010
Pouring the Basement Slab
The Basement Slab Being Poured, August 16, 2010
Footings and foundation have been built, stubs have been placed for plumbing, and now it's time to pour the slab for the basement. The slab is poured in sections, and spread as it is poured. A basement slab is usually poured in three sections, with the middle being poured last. Concrete is poured continuously and must be spread fast so it sets as evenly as possible. The temperature today is 105F, so this won't be an easy job.


Given the temperature today, 105F, imagine what it must be down here.

Finished slab, 1900, 8/16/2010
Friday, August 13, 2010
Preparing to lay slab for basement
Tuesday, August 10, 2010
Foundation Walls Backfilled
Sections of the foundation walls were backfilled Monday, August 9, 2010.
Front, left

Front, right

Left side, middle

Left side wall of basement

Basement slab will be set before final backfill
Sunday, August 8, 2010
Laying the Foundation: Phase 5
Foundation walls went up Wednesday, August 4th. These photos were taken Sunday, August 8. They show the state of the concrete after three days of curing in 90 degree temperatures. There's evidence of exposed aggregate and cracking. Some cracking is normal in poured concrete foundations and may have no effect on structural integrity. However, it's worth checking out, as the integrity of the foundation to water penetration in also essential and may be compromised by cracking.
Wednesday, August 4, 2010
Laying the Foundation: Phase 4
Concrete was poured for the foundation today, August 4, 2010
Side walls were completed in the morning and concrete was delivered shortly thereafter. If I heard right, 42 cubic yards of concrete was ordered for the foundation. That's a lot of concrete. A cubic yard of concrete is 27 cubic feet, equivalent to a 3' x 3' x 3' box. Stack 42 of the boxes to make one very large Rubic's Cube. Imagine a 126' long, 126' wide, and 126' high Rubic's Cube worth of concrete. I saw three large cement trucks at the site and was told that more were on the way.
The pouring is done using a cement truck fitted with a crane. The crane hoists a flexible hose that delivers the cement to the framed side walls, where a worker guides it to fill the frame. Workers who do this must have sure footing and strong arms, as the photos below will illustrate.


Tuesday, August 3, 2010
Laying the Foundation: Phase 3
Side forms going up, August 3, 2010
Photos below show the side walls going up prior to pouring the concrete foundation. I had an opportunity to discuss the foundation with Dave and the foundation sub, Brian Anderson. I was interested in how water drainage will be handled on the lot, and how the foundation will be sealed to prevent water penetration in the basement.
Dave said that there will be a drain tile installed and it will flow to a french drain. Brian said that the concrete will be allowed to cure 5 to 7 days and then the outside will be sealed with an emulsifier before backfilling. Sealing at the junction of the footing and the foundation wall will be done by hand.
In examining the east side of the foundation side wall, I raised a question about the setback from the property line and the possibility that a heat pump and a compressor will be set there, just north (to the back) of the 3/0 garage door exit. Dave told me that the neighbor's landscaping on that side encroached over our property line and that's why the area along the east side looked too narrow to accommodate the units. I asked Dave to talk with the neighbor about the necessity of reconfiguring his landscaping (looks like a minor problem).
Front, from west side

Across site from NW to SE
Back from west side

Front to back, east side of lot

Front, SE to NW
Subscribe to:
Comments (Atom)


